Introduction
Making a quilt can be a deeply rewarding experience, blending creativity with practical skills. Whether you’re looking to make a cozy blanket for yourself or a heartfelt gift for someone special, this guide will teach you how to make a quilt from start to finish. By understanding the essential tools, techniques, and steps involved, you’ll be well on your way to creating a beautiful and functional work of art.

Essential Tools and Materials
Before you start quilting, gather all necessary tools and materials. The right equipment will make the entire process smoother and more enjoyable.
- Cutting Tools: You’ll need a rotary cutter, a self-healing cutting mat, and sharp fabric scissors.
- Measuring Tools: A clear acrylic ruler and a measuring tape are essential for accuracy.
- Sewing Machine: While you can make a quilt by hand, a sewing machine makes the process faster.
- Pins and Needles: Quilting pins, safety pins, and sewing needles are crucial.
- Thread: Use high-quality cotton thread that matches your fabric.
- Iron and Ironing Board: Pressing seams and fabric is crucial for a polished finish.
- Basting Spray or Safety Pins: These help hold the quilt layers together before final sewing.
- Quilt Batting: This is the middle layer that adds warmth and texture.
- Fabric: Choose fabric for the quilt top, backing, and binding.
Having these tools and materials ready will make the quilting process more efficient and enjoyable.
Choosing Your Fabric
When it comes to selecting fabric, the options are nearly endless. Fabric choice plays a significant role in the look and feel of your quilt.
- Types of Fabric: Cotton is the most popular choice due to its durability and ease of use. However, you can also use flannel, linen, or specialty fabrics for different textures.
- Color and Pattern: Think about the color scheme and pattern that suit your project. Solid colors, prints, and batiks can all add unique elements to your quilt.
- Fabric Quality: Opt for high-quality fabrics that are soft, durable, and colorfast.
Choosing the right fabric can make or break the final appearance and longevity of your quilt.

Preparing Your Fabric
Once you’ve chosen your fabric, proper preparation is key to a successful quilting project.
- Washing: Start by washing your fabric to pre-shrink it and remove any chemical finishes.
- Ironing: Iron your fabric to remove any wrinkles. This step ensures that cuts are accurate.
- Cutting: Use your rotary cutter and cutting mat to cut the fabric into precise shapes as per your quilt pattern.
Preparation is essential to avoid issues later on, such as uneven seams or fraying edges.
Assembling Your Quilt Top
With your fabric prepared, you can now focus on assembling the quilt top, the most visible part of your quilt.
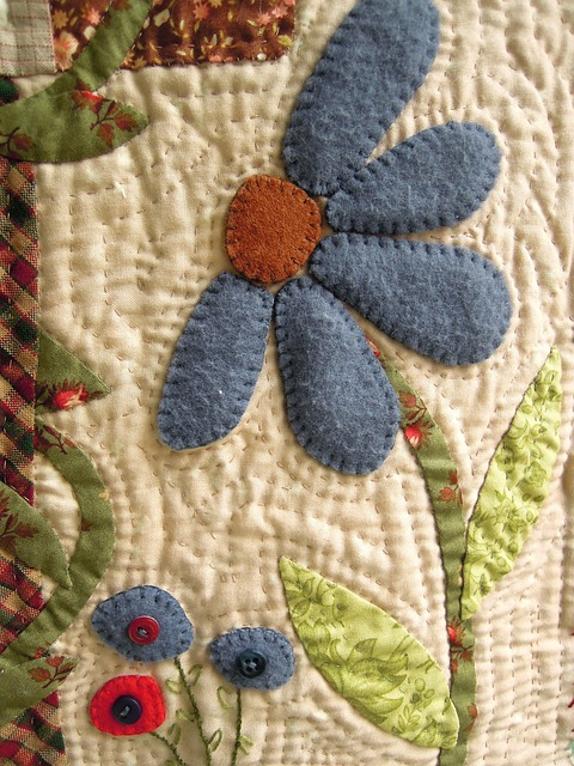
- Pattern: Follow a pattern or design layout. Common patterns include squares, triangles, and more intricate designs like stars or flowers.
- Sewing: Begin by sewing small pieces together to create blocks. Make sure to press seams open or to one side as you go.
- Joining Blocks: Once the blocks are complete, sew them together to form rows. Then sew the rows together to form the entire quilt top.
Taking your time with accurate cutting and sewing will result in a more professional-looking quilt top.
The Quilt Sandwich: Layering Your Quilt
After completing your quilt top, the next step is to create a ‘quilt sandwich,’ which involves layering the quilt top, batting, and backing.
- Laying Out the Layers: Lay your backing fabric down first, wrong side up. Place the batting on top of the backing, and then place the quilt top on top, right side up.
- Smoothing and Basting: Smooth each layer to remove wrinkles and use basting spray or safety pins to hold the layers together.
- Trimming: Trim any excess fabric or batting to make all layers even.
Creating a smooth, wrinkle-free quilt sandwich will make the quilting process much easier.
Quilting Techniques: Hand vs. Machine
Once your quilt sandwich is assembled, it’s time to quilt the layers together. You can choose between hand quilting and machine quilting.
Hand Quilting
- Pros: Offers a traditional look and feel, allows for intricate designs, and can be meditative.
- Cons: Time-consuming and may require more skill.
- Technique: Use a quilting hoop to keep layers taut. Stitch with a needle and thread, creating even stitches.
Machine Quilting
- Pros: Faster and more convenient, especially for larger quilts.
- Cons: May require some practice to master.
- Technique: Use a walking foot or free-motion quilting foot on your sewing machine. Stitch in straight lines or create free-form designs.
Both methods have their unique advantages, so choose the one that best suits your project and skill level.
Binding the Quilt
Binding is the final step that gives your quilt a finished, polished edge.
- Cutting the Binding: Cut strips of fabric for the binding. The strips should be about 2.5 inches wide.
- Attaching the Binding: Sew the binding strips together to form one long strip. Fold it in half and iron. Sew the binding to the edge of the quilt, folding the corners as you go.
- Finishing: Fold the binding over the edge to the back of the quilt and hand-stitch it in place for a neat finish.
Binding adds durability and a professional finish to your quilt.

Conclusion
Making a quilt is a fulfilling journey, blending creativity with skill. From selecting your fabric to binding the edges, each step contributes to creating a lasting piece of art. With patience and practice, you’ll be able to craft beautiful quilts that provide warmth and joy for years to come.
Frequently Asked Questions
What is the easiest quilt pattern for beginners?
The easiest quilt pattern for beginners is the simple ‘Square Patch’ pattern. It involves sewing together squares of fabric, requiring minimal cutting and straightforward stitching.
How long does it take to make a quilt?
The time it takes to make a quilt varies depending on complexity and your skill level. A simple quilt can take a few days to a week, while more complex designs may take several weeks or even months.
Can I quilt without a sewing machine?
Yes, you can quilt without a sewing machine. Hand quilting is a traditional method that involves sewing the quilt layers together by hand. While more time-consuming, it offers a unique, handcrafted quality.
